Affichage des articles dont le libellé est tutorial. Afficher tous les articles

samedi 3 septembre 2011

how to customize a (metal) t shirt


if you don't know the Anvil band, let's see this film and you'll love them.
right after i saw it i went (on the internet) to buy their tshirt and album to support them. and I discovered that they're also so cool to listen to.

but the tshirt was a way too big for me. then I have looked (on the internet again) for a way to customize it and I have found jillions of ways to do it.
this way that I'll show you is the most used (it rages on blogs, sites and on youtube's videos) maybe because it's the easiest, you'll see.

maybe you wouldn't even need a sewing machine (I mean that some hand sewing could be enough).

let's start:

take the big tshirt and cut off the sleeves (keep them) and the higher part (in orizontal, just down the "nek"):


then cut the "edge" of the back shirt, what remains from the armpits to the superior part of the back (I have not made the pic of that but you will understand seeing the next photo)

then you must make two things, one is fundamental and the otherone is not. (explanations under the photo, otherwise is impossible to understand)


we start from the not-fundamental thing:

that is about to make an hem on the upper part of the back side of the shirt. I did it and I think that it isn't even useful, because with the hem, the edge of the shirt will falls and hangs in a very strange way and then you should sew a pince to make it look good (oh I hope you'll unterstand my english^^)
while if you just cut the tshirt, the edge would naturally roll up being more elastic. so, don't sew a hem (even if in the photo there are some pins)

now the fundamental thing:

make a hem on the tall part of the shirt (where the neck used to be) that it has to be wide enough to welcome a drawstring for when you will tie it around your neck, in this way:

making the drawstring will b easy: do you remember the sleeves that you have cut? cut away the edge of the sleeve maintaining the seam and you will have two half drawstring that you will sew together and then, with the help of a nanny pin, you will pass it in the edge.

if the shirt is too long you can recover the drawstring from the edge in lower tshirt (in this way you will directly have a long drawstring with, subsequently, no need to sew)

And now a little revenge against all of those that had made fun of me because of my black crocs:


I rock! :)


mardi 16 août 2011

easy skirt (tutorial)

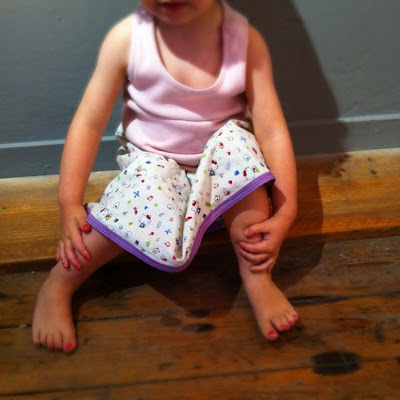
here's an easy peasy skirt to do for your kids (of for you?)

all you nedd is  a rectangle of cloth (width will depend from how much you'll want the skirt to be ample and the height will depend from how much you want it long) and an elastic band (for the waist).

here's the step-by-step photo-tutorial:


you can use whatever fabric you want,  look:


mardi 2 août 2011

the cardboard stove (diy)

although I dream this kitchen for Mina (or even the ikea one ) the space in her room is small indeed (and the availability of money also!). and then Guicho had this beautiful idea (and put it into practice!) to create her one stove with:

-a carboard box
-scissors
-tape
-pens
-3 screws
-2 corks

here it is, ins't it nice?


(the screws are for fixing the half cork to the cardboard. so the "handle grips" of the stove could be turned!)


mercredi 27 juillet 2011

cloth diaper diy

here a tutorial to do a cloth diaper "all in one" with a funny fabric (fashion style!)

I have picked the materials for the diaper on a French site named couche-nature.fr. i took this for the impermeable part and this for the size that is "in touch" with the skin, it's micropile (I know, it is not as natural as  bamboo or hemp but I like it because it leaves the baby skin dry).

for the external decorative fabric, you can obviously use what you prefere. and for the inside absorbent part, I have sewn some double rectangles in hemp (I bought hemp here).

1) I have started by doing the pattern from a diaper I had already just to have an idea about forms and measures.


2) cut the 3 fabrics in the form that you have drawn.

3) cut the upper micropile side (if you use the microplile), it's from there that you will insert the stuffing. the micropile do not fraye but I have stitched two little points to avoid that the opening opens too much.


4) now assemble the impermeable part and the colored fabric (i didn't put pins to don't make holes in the impermeable fabric, i fixed them with TAPE)
then, with a cloth pen I marked the points where will be the buttons (or the strap). position the fabrics wrong sides together.

I have added a small rectangle of micropile before putting the buttons to consolidate the fabrics.


5) you should now have these two pieces: the fabric of micropile already "shaped" plus the impermeable fabric and that decorative one kept together from the buttons (or from the strap)

(in this pics i didn't finished putting buttons. it take too much long, i hate this part!)

6) assemble the two pieces (that are actually 3, if you follow) right sides together. (oh yes, also the micropile has a side!), pin in place (put the pins in a more external position in comparison to where the seams will be for avoiding to have a riddled impermeable part!) and sew the whole perimeter.

nb: you don't have to leave openings because you will turn the diaper (inside out, at the end) from the opening of the micropile (smart^^)


7) after having sewn the perimeter, you can add the elastic. the elastic is sewn with a zigzag point holding it taut. and it must be put in the narrowest part (where will be legs) and also in the upper part (where will be lower back).
did I explained my slef? :S


8) turn it inside out


9) now you can add closing buttons (or strap) 


e vooilàààà!!!!


lundi 25 juillet 2011

sewing a mouse-mole

here's a tutorial of a "step by step" how to  sew a toy. i only ask you two things:
  1. don't use this tutorial -or final toy- for commercial uses. don't sew it and sell it on ebay/etsy/bigcartel/dawanda/markets/neighbours/etc
  2. if you sew it, please, send me a pic. i'm just too curious!
  3. this drawing/toy/immage are copyrighted, thanks


it started with a sketch.


then a little more detailed sketch


then a "final sketch" (can I say that?) to choose colors and fabrics.

and here we go:

the face, a cone.


the "hairy" ears and the cloth eyes.


arms are long and tubular.


stuffing the face


pinning the face/cone on the rest of the face.


i sewed the face to the rest of the body "right side facing them" to hide the seam


and now the assemblage of the front and of the back of the mouse-mole.
you have to sew them right side together and don't forget to insert arms, legs and ears, so you'll sew them together all in once:


in the photos here above everything is fixed with pins: arms, legs and ears are turned toward the inside.


sew the whole perimeter leaving an opening to be able to turn it.


turn it.


now stuff it and sew the opend part to close it.


then i sewed a tote bag to put it inside, for the pattern of the bag you could rely on great Soulemama and her book Handmade Home.


I have decided to sew the letters with the "appliques" method (it was a present for "Swan", a girlfriend's kid) cuz i were galvanized by the Sew Liberatedbook.


now i just have to explain to my daughter that the present is not for her...


...and it will be hard.
:)))
Related Posts Plugin for WordPress, Blogger...